Assets
Assets is the register. Everything else in Manifest reads from it, writes to it, or reports on it, so most of what you do in a working week happens on this one screen.
- For
- Finding a machine, seeing it at a glance, opening its record, and changing it, one at a time or two hundred at once.
- Will not
- Retire or verify machines in bulk. Disposed is deliberately absent from the bulk status menu, because two hundred disposals in one click produce two hundred records with no account of how they left, and the account is what an auditor asks for. Verify is offered for one asset at a time, because a verification is somebody looking at a machine.
- Writes
- The asset record and its audit trail. Deleting is a soft delete: the row is hidden and its history kept, because a machine that existed still happened.
- On iPhone
- The Assets tab holds the same register, for reading, verifying and reassigning in front of the machine.
What you are looking at
Assets opens on a table of everything you hold, with a glass inspector beside it. The table is the default because a register is a list before it is anything else, and because the column set is yours to decide.
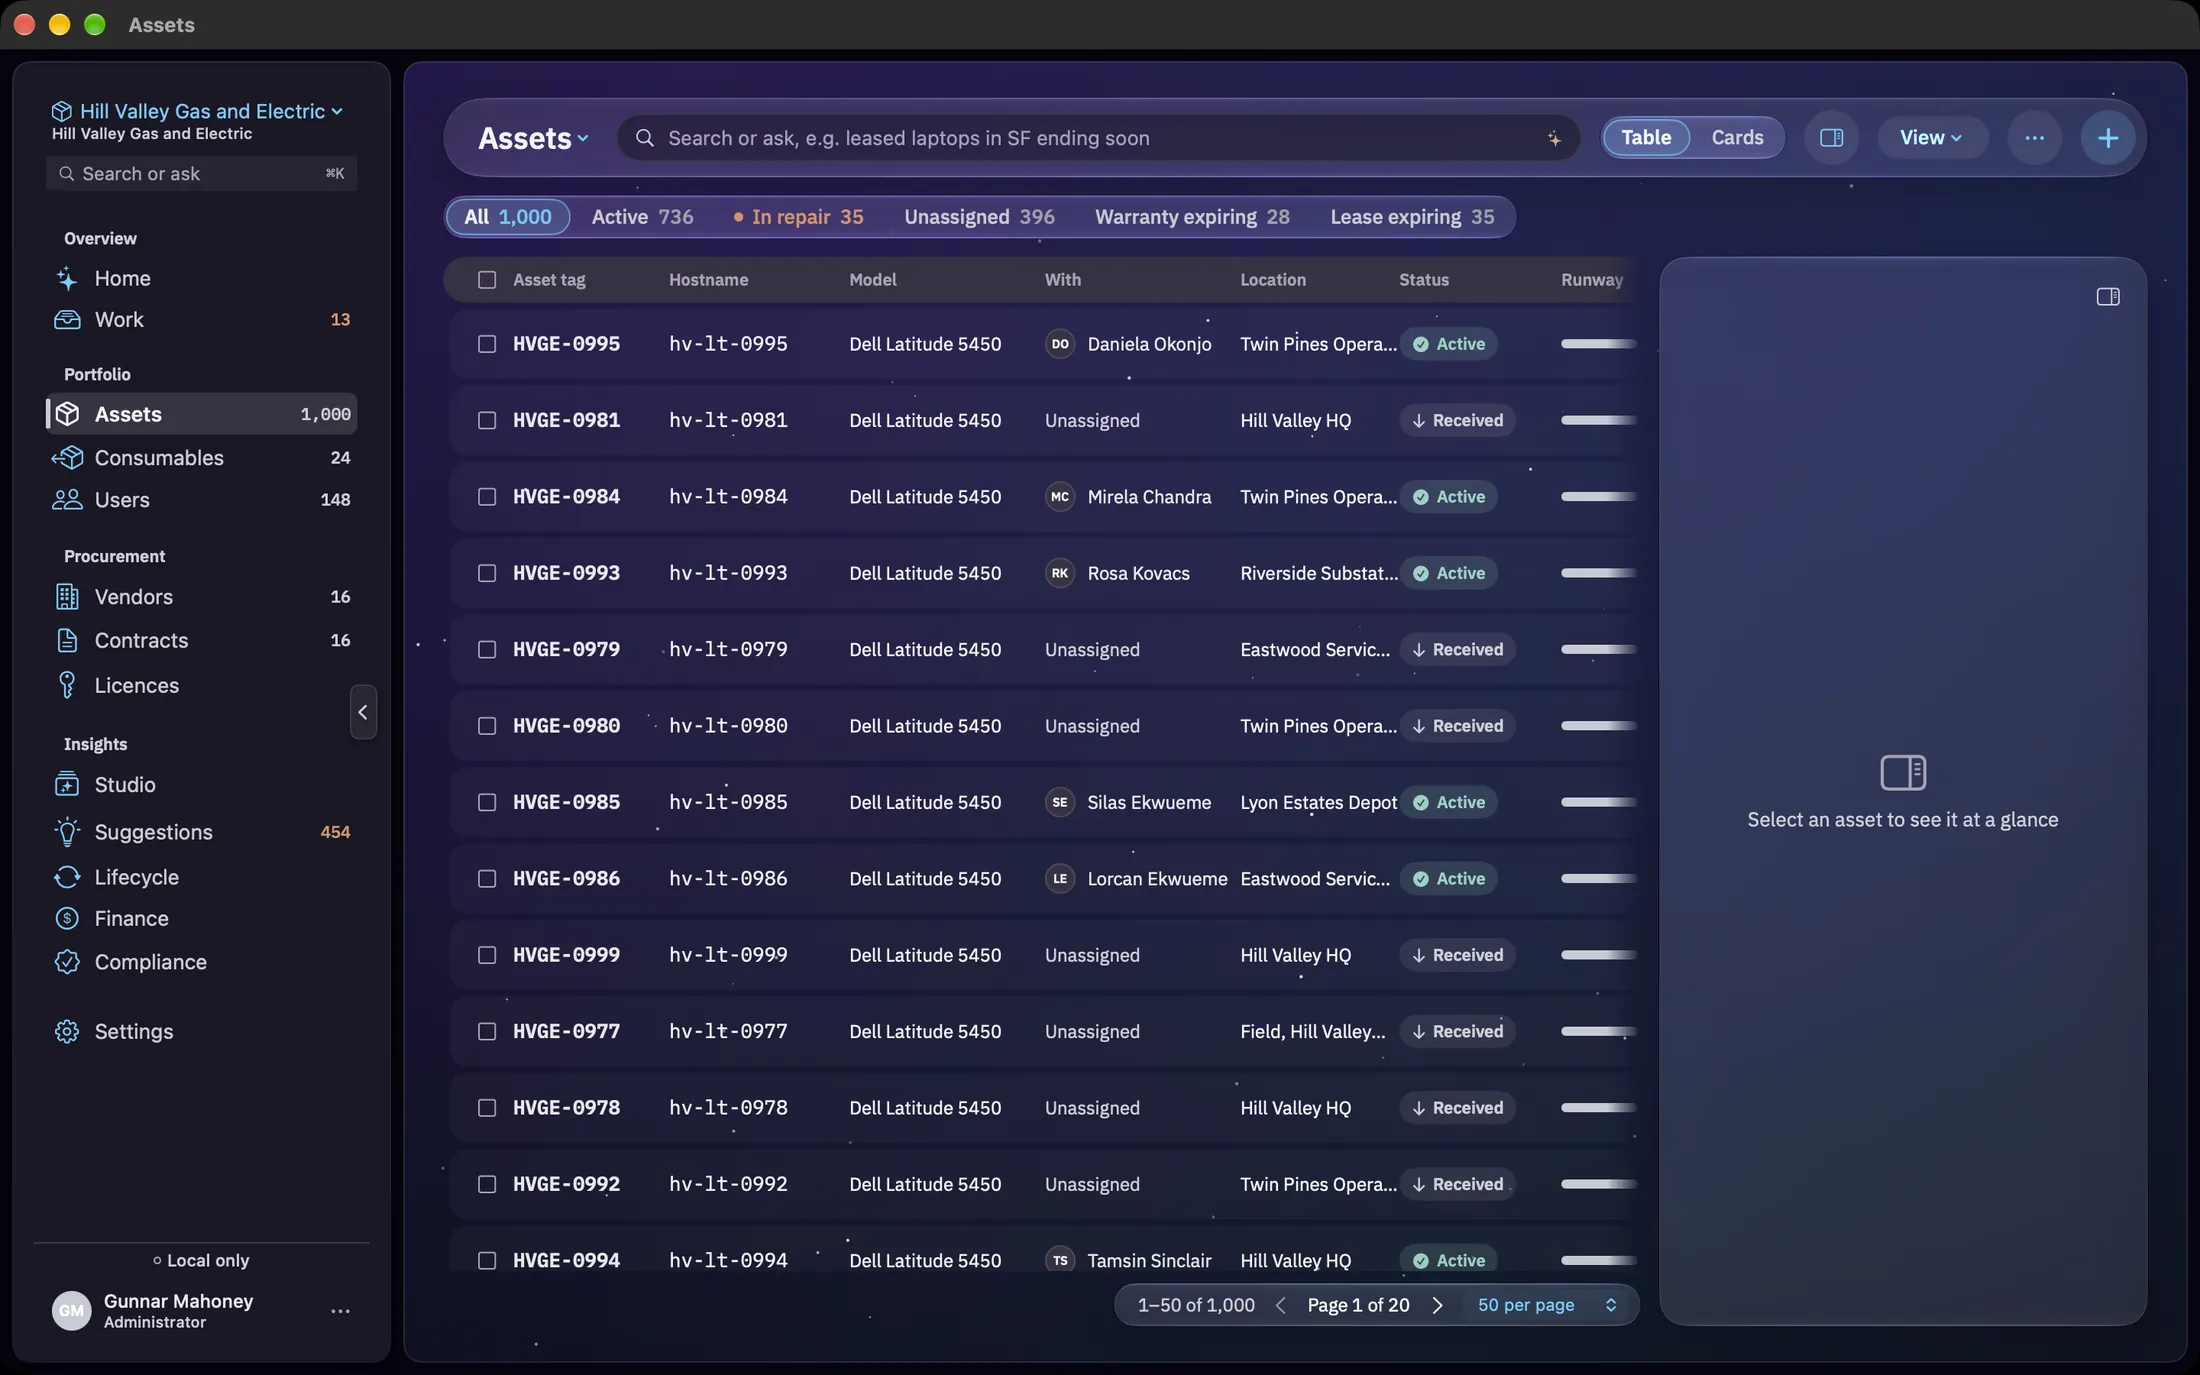
Everything you steer the screen with sits in one floating glass bar. Left to right: the title, which is also the saved-views menu, with the count beside it (1,000, or 35 of 1,000 under a filter); the search box; the Table and Cards switch; the inspector’s button; View; the ••• menu; and + to add assets. Under it sits one row of glass filter pills, and under those the table, with its page control (20, 50 or 100 per page) riding under the rows.
A click on a row selects it and the inspector fills in: the tag, the make and model, the status, then four facts, With, Where, Verified and Warranty. When the machine is missing something for compliance, a card says how many things and how many of the total are done, names the first one and offers one next step. That button opens the record at the place the gap is filled in; nothing is recorded until you do it there. Any open job on the machine is listed under Work, and a click opens it in Work. The foot carries Verify, Flag and Open. Verify is the prominent button only while a verification is due, and one press records it, as on the record itself.
The inspector folds away with its own button, with Hide inspector in the View menu, or with ⌥⌘I, and the choice is remembered. Folded, it leaves a small tab on the table’s edge that brings it back. Cards lays the same register out as a grid, each card showing the device, its tag and model, who has it, its status, where it is and a ring for the warranty left. The inspector works beside the cards exactly as it does beside the table, and Table or Cards is remembered for each workspace.
Opening is a separate act from selecting: double-click a row, press Return on it, choose Open asset from its context menu, or press Open in the inspector. The record takes the place of the table and the sidebar turns into a list of its sections, with Back to Assets at the top. The arrow keys move the selection, ⇧ extends it, ⌘-click adds a row, and the box at the start of each row adds or removes just that one, so choosing fifty machines never opens fifty records on the way.
Finding one machine
The search box does two different jobs, and which one it is doing is always on screen.
Type, and it filters as you go. The match runs in the database across asset tag, serial number, make, model, assigned user and location, several words at a time, so it stays quick on a fleet rather than a demo. A banner under the pills reads Filtering by and your words, with a Clear on the right. ⌘F puts the cursor in the box from anywhere on the screen.
Press Return, and the sentence is read as a question instead. The sparkle at the end of the box is the reminder. The text is turned into filters: a status, a kind of device, leased or bought, unassigned, a lease or a warranty ending soon, a verification overdue, encrypted or not. The banner then quotes your question and says what answered it. There is a Clear on the right of the banner. Typing in the box again, or clicking a pill, also drops the question.
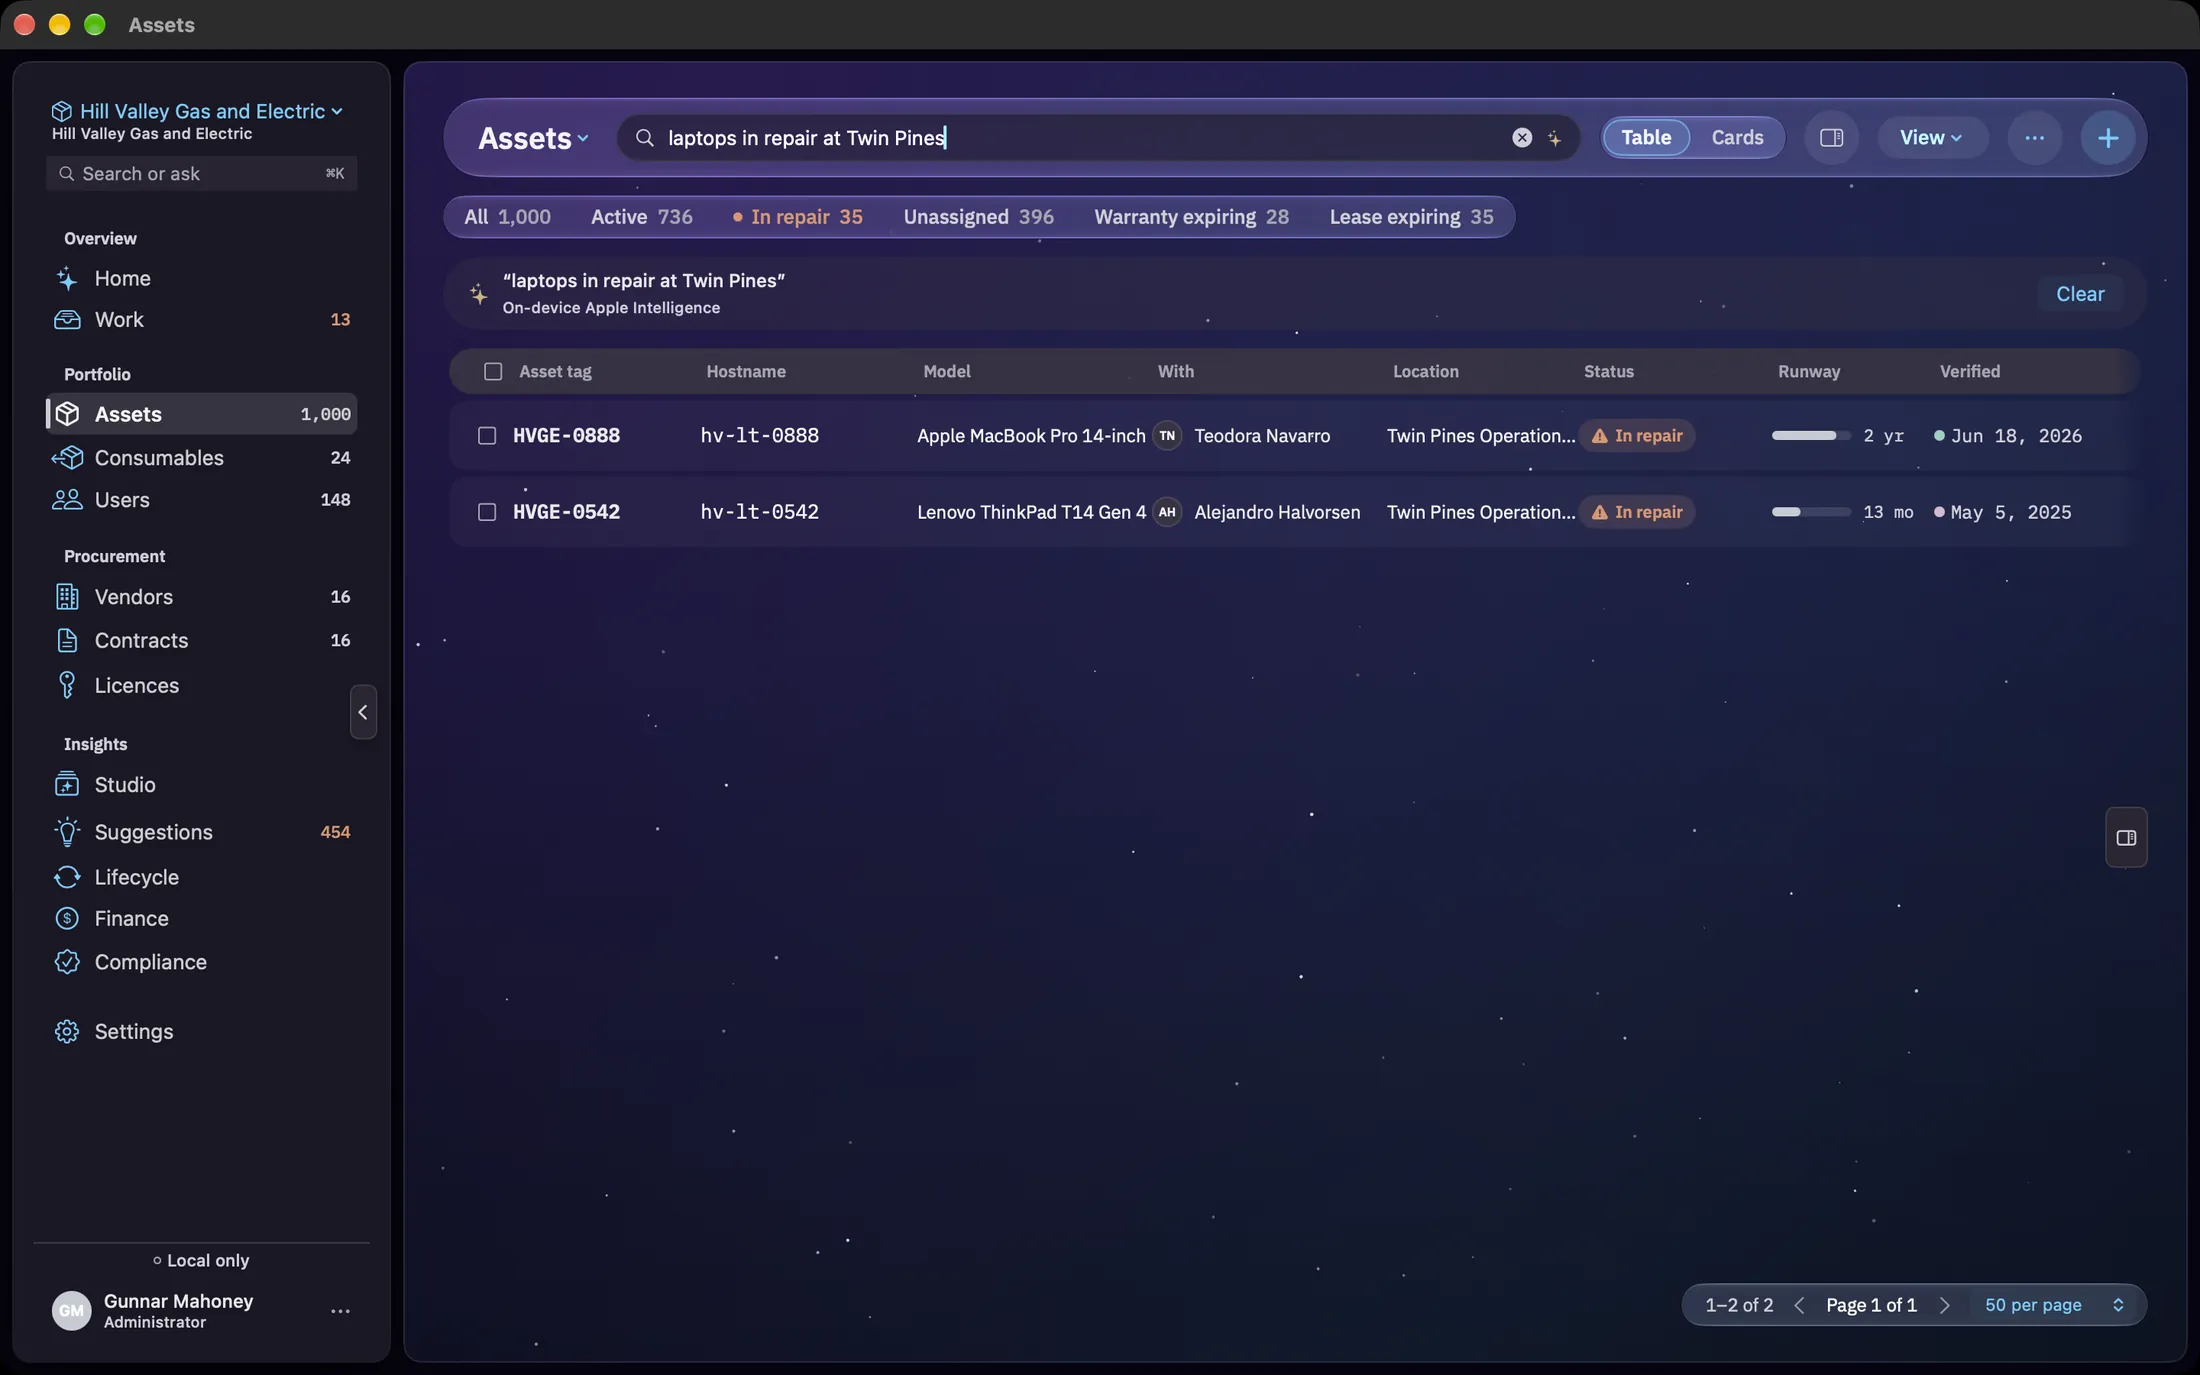
Both paths are local. There is no server in this feature, which is also why the answer to a vague question is sometimes an empty table rather than a guess: an inventory that invents matches is worse than one that says it found nothing. When neither the model nor the parser can read the question at all, the banner says so, and the rows are a plain keyword search for its words.
Narrowing the whole list
Pills for the six questions worth one click, saved views for the ones you ask every week.
The pills are All, Active, In repair, Unassigned, Warranty expiring and Lease expiring, each with its count across the whole register. In repair carries a small dot when anything is at the depot, as a to-do rather than an alarm. The last two are not fixed windows: they use the warning periods set in Settings, so if your policy says ninety days, that is what the pill means. All is the way back to everything, and clears the search box too.
The title at the far left, reading Assets until you pick a view, is the saved-views menu. A view carries its own status filter, sort, grouping, column set and density, and can be shared with the organisation, so “In storage, warranty ending soonest first, with vendor and purchase price” is one click rather than four. New view… and Edit for the current view are at the bottom of that same menu.
Changing what the table shows
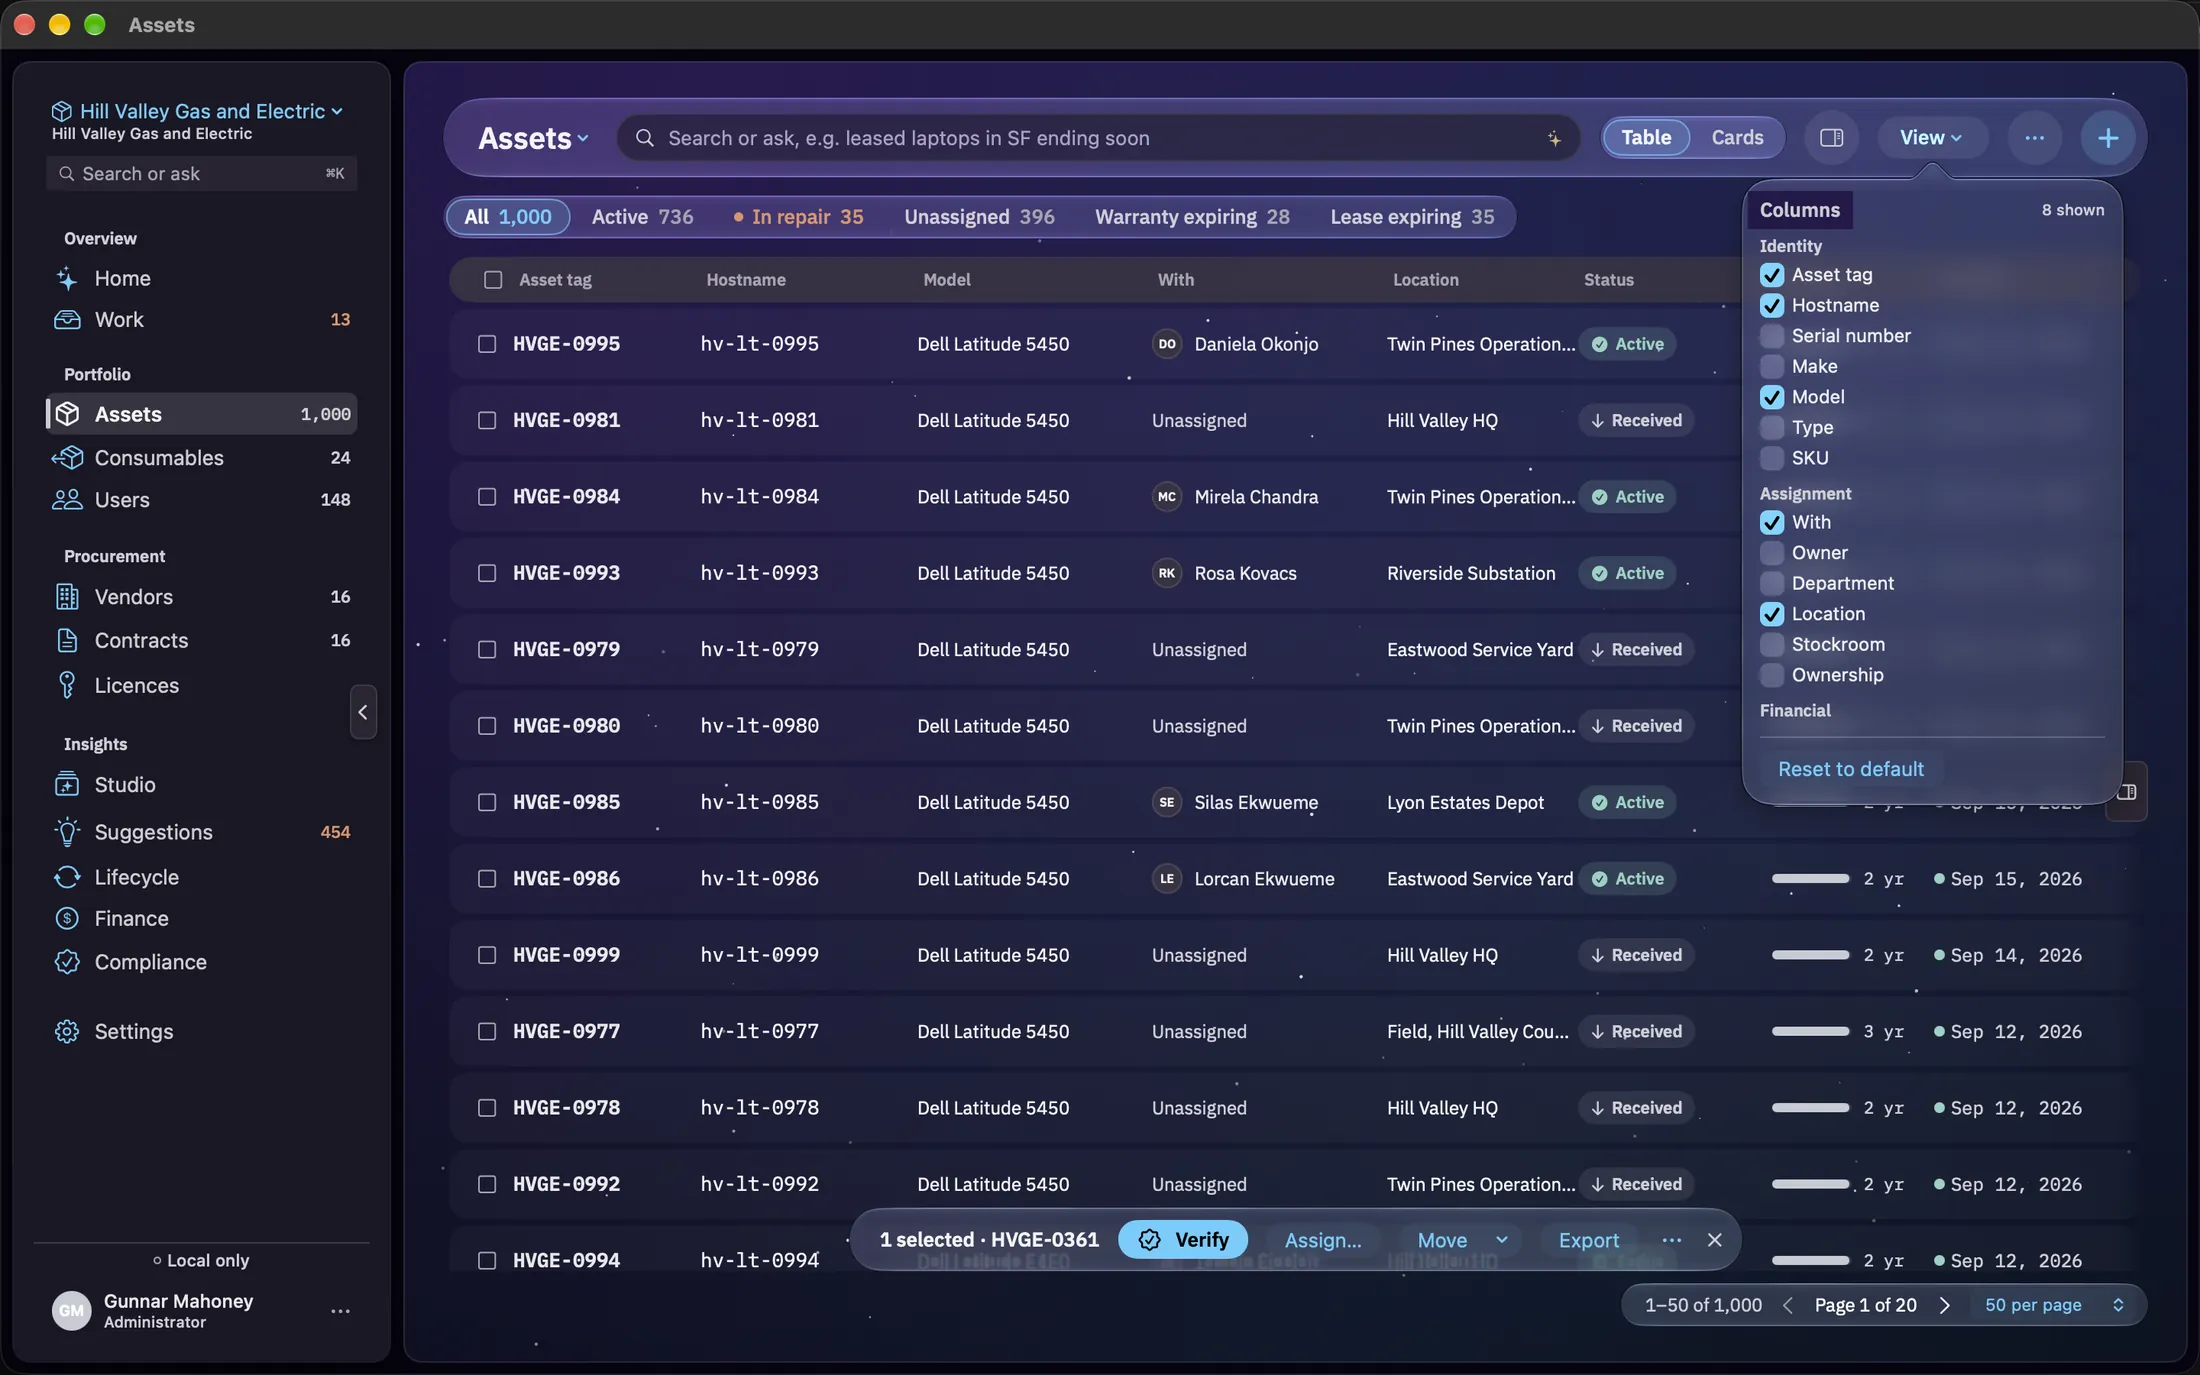
One View menu for the layout and the shape of the rows, and a Columns chooser for what the table holds.
- Layout. Table and Cards are the two the toolbar switches between. The View menu also holds List, which opens a record on a single click and has no inspector, and Map, which plots the same filtered rows on Apple Maps.
- Sort by offers recently added, asset tag, model, assigned user, warranty expiring soonest and lease expiring soonest. Row density (comfortable or compact) sets how tightly the List layout packs its rows.
- Group by runway (Horizon) appears in the List layout and breaks the list into bands by how much planned life is left, which is the fastest way to see a refresh year coming.
- Hide inspector or Show inspector, in Table and Cards.
- Columns… is table-only. Thirty-five columns are available in five groups, Identity, Assignment, Financial, Lifecycle and Security & compliance, and any custom field you have defined appears in its own group automatically. Right-click a column heading for the same list, or to move that column left or right, or drag a heading to reorder. Your arrangement is remembered between launches on this Mac.
Reading a record
Open a row and you get the machine: who has it, where it is and its serial across the top, then every section that has something to say about it.
The sidebar lists the record’s sections. Overview comes first, then Alerts when there are any, then Record, which holds the fields: Identity, Assignment, Network, Compliance, Financial, Lifecycle, Disposition once the machine is disposed, Book value when the machine has one, and Custom fields when you have defined any. Under those come Contracts, Licences, Connected hardware, Repairs, Documents, Events and Activity, each with a count, so an empty one still tells you something.
Press Edit and the record becomes one form, in sections. Besides the familiar ones, three hold the evidence an auditor asks for. Network has Hostname, MAC address, IP address, Operating system, OS version and Device management. Financial adds Invoice number, GL account and, for a purchase, Depreciation (straight line, declining balance or not depreciated). Lifecycle adds Received and End of support, and Assignment adds Due back. Business use sits in Identity, and prompts for a value when the machine is in card-payment scope.
The IP address is typed by hand, and the form says so: Typed by hand. The IP address stays on your own devices: this Mac and your paired iPhone. It is never sent to Starkive Cloud. Discover and imports never fill it in.
Whether a device is approved to be on your network is a decision, not a field. The Actions menu has Connection review, with Approve to connect, Mark not approved and, once decided, Return to pending review. Each one records who decided and when. Home counts the devices still waiting to connect.
The QR code beside the asset tag is worth knowing about early. It opens this record in the iPhone app, and its buttons copy the code, save the label as a PDF, or print it. Activity at the bottom is the audit trail for this machine alone, with its lifecycle events: who changed what, and when.
Adding assets
Four ways in, and they are on one sheet because the right one depends on what you are holding.
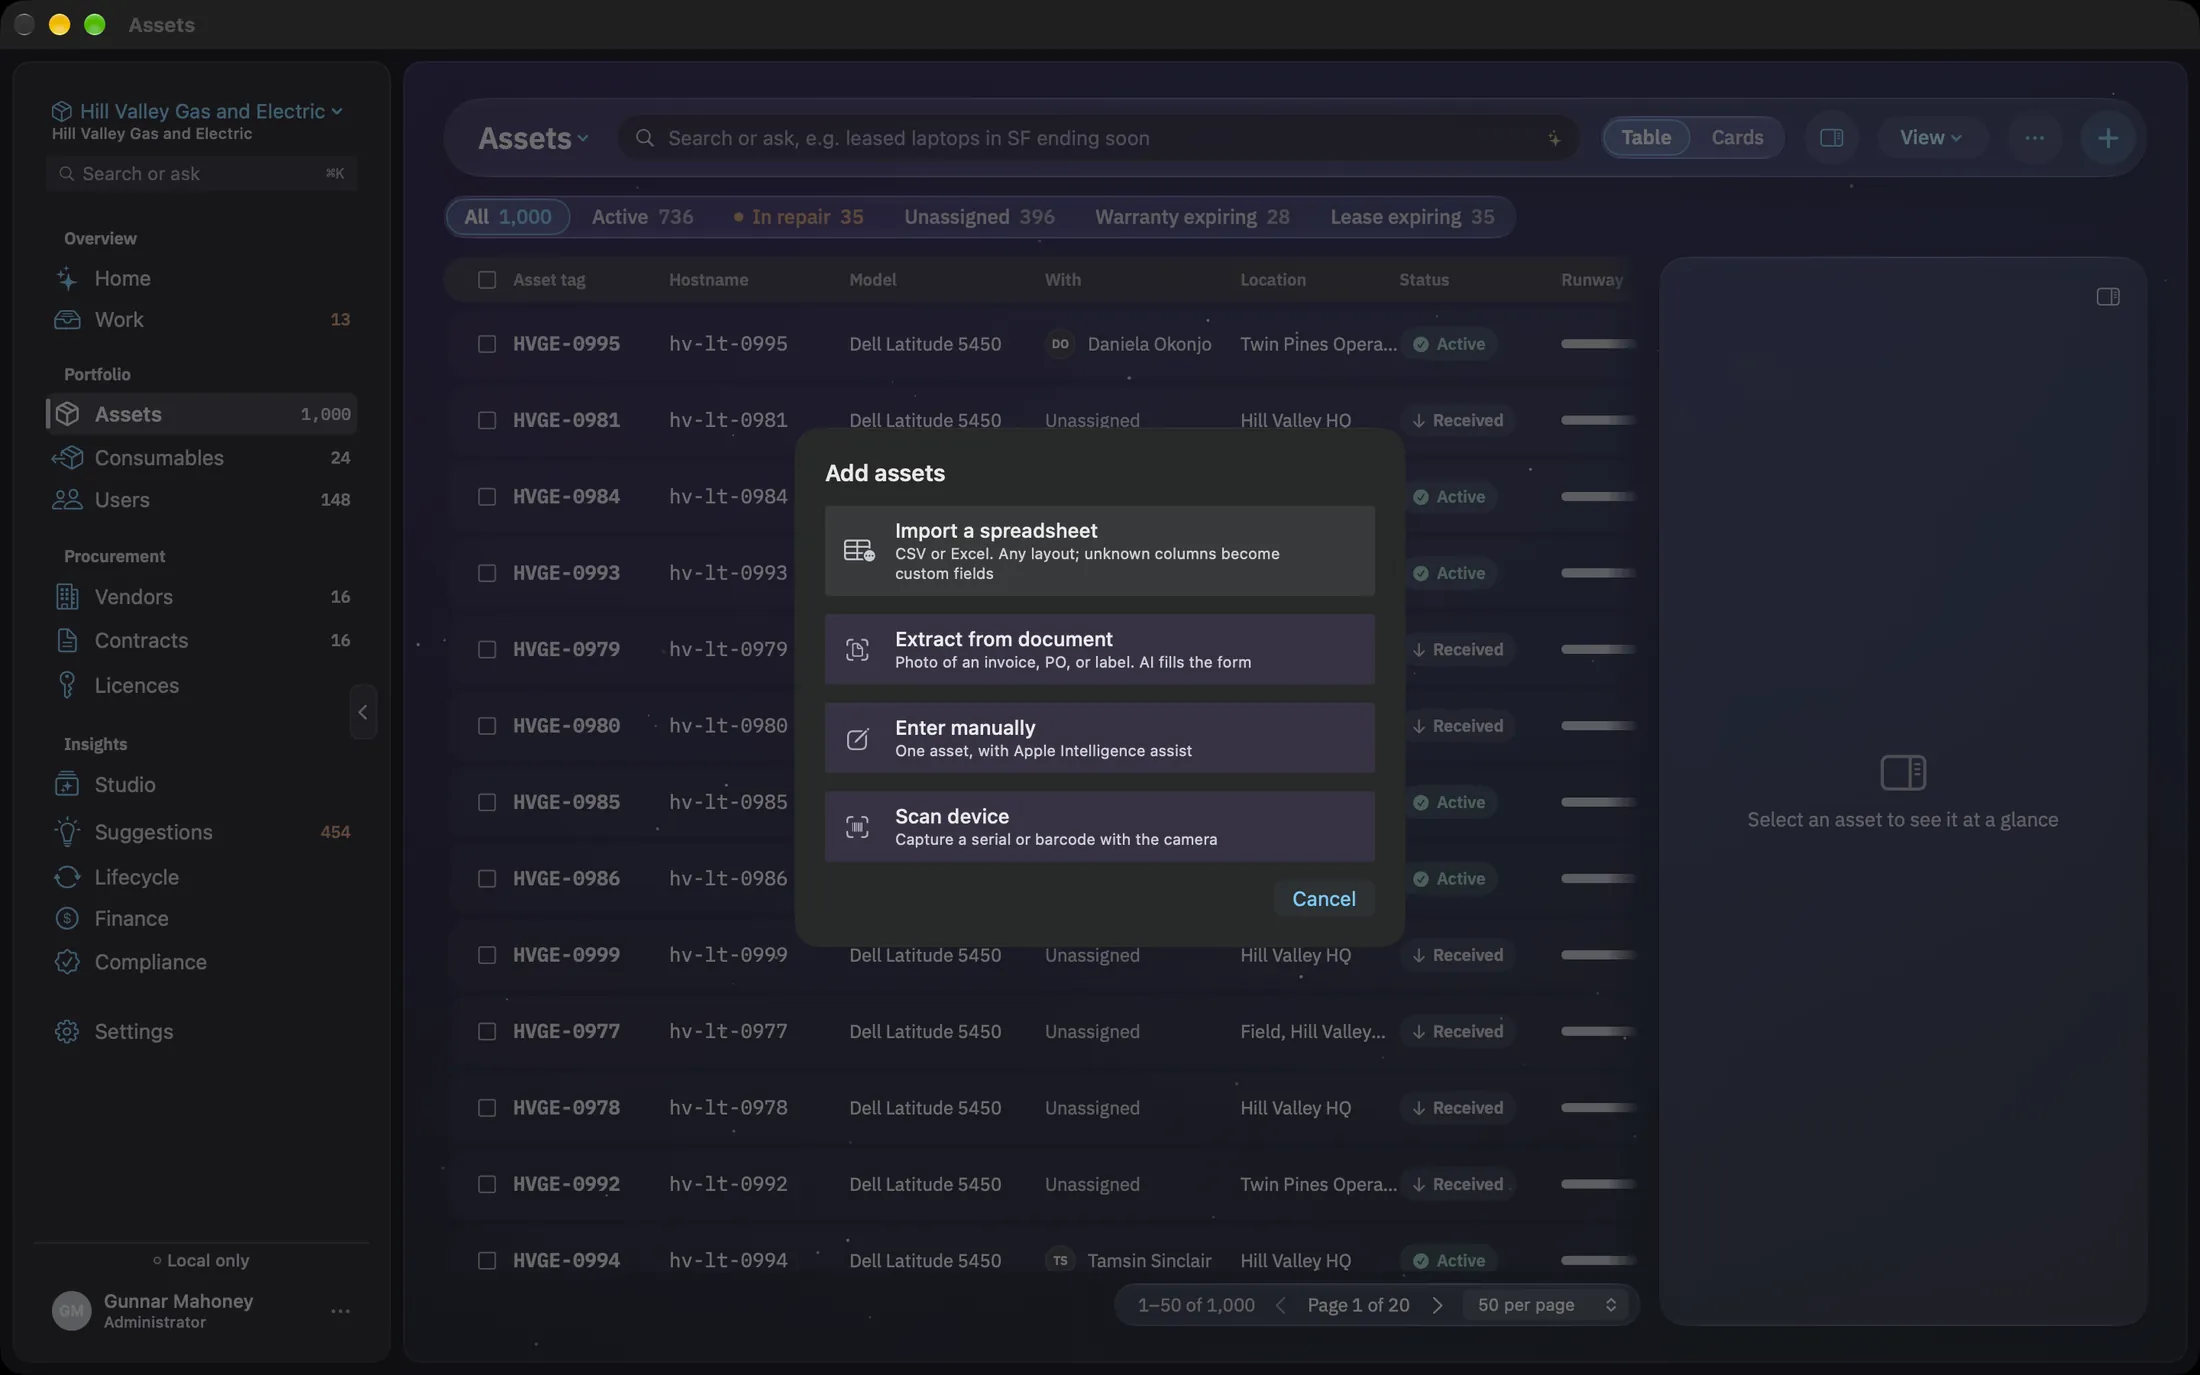
⌘N. Each way in ends at a step you check before anything is written to the register.Import a spreadsheet
CSV or Excel. You do not have to reshape the file first: columns are matched on their values as well as their headers, so a column called Who full of names is recognised as an assignee. Columns that are yours alone become typed custom fields instead of being dropped.
Extract from document
Point it at an image of an invoice, a purchase order or an asset label. The text is read on the Mac, the fields are pulled out, and the intake form opens filled in for you to check.
Enter manually
One asset, with Manifest suggesting as you go.
Scan device
A serial or barcode through the Mac’s camera, which is the receiving-desk path: a delivery, a box, a machine at a time. Each read joins a queue marked new or duplicate, and nothing is added until you add the new ones.
Doing it to two hundred at once
Select anything and a glass bar rises along the bottom, in Table and in Cards alike. Selecting is the whole gesture; there is no mode to enter.
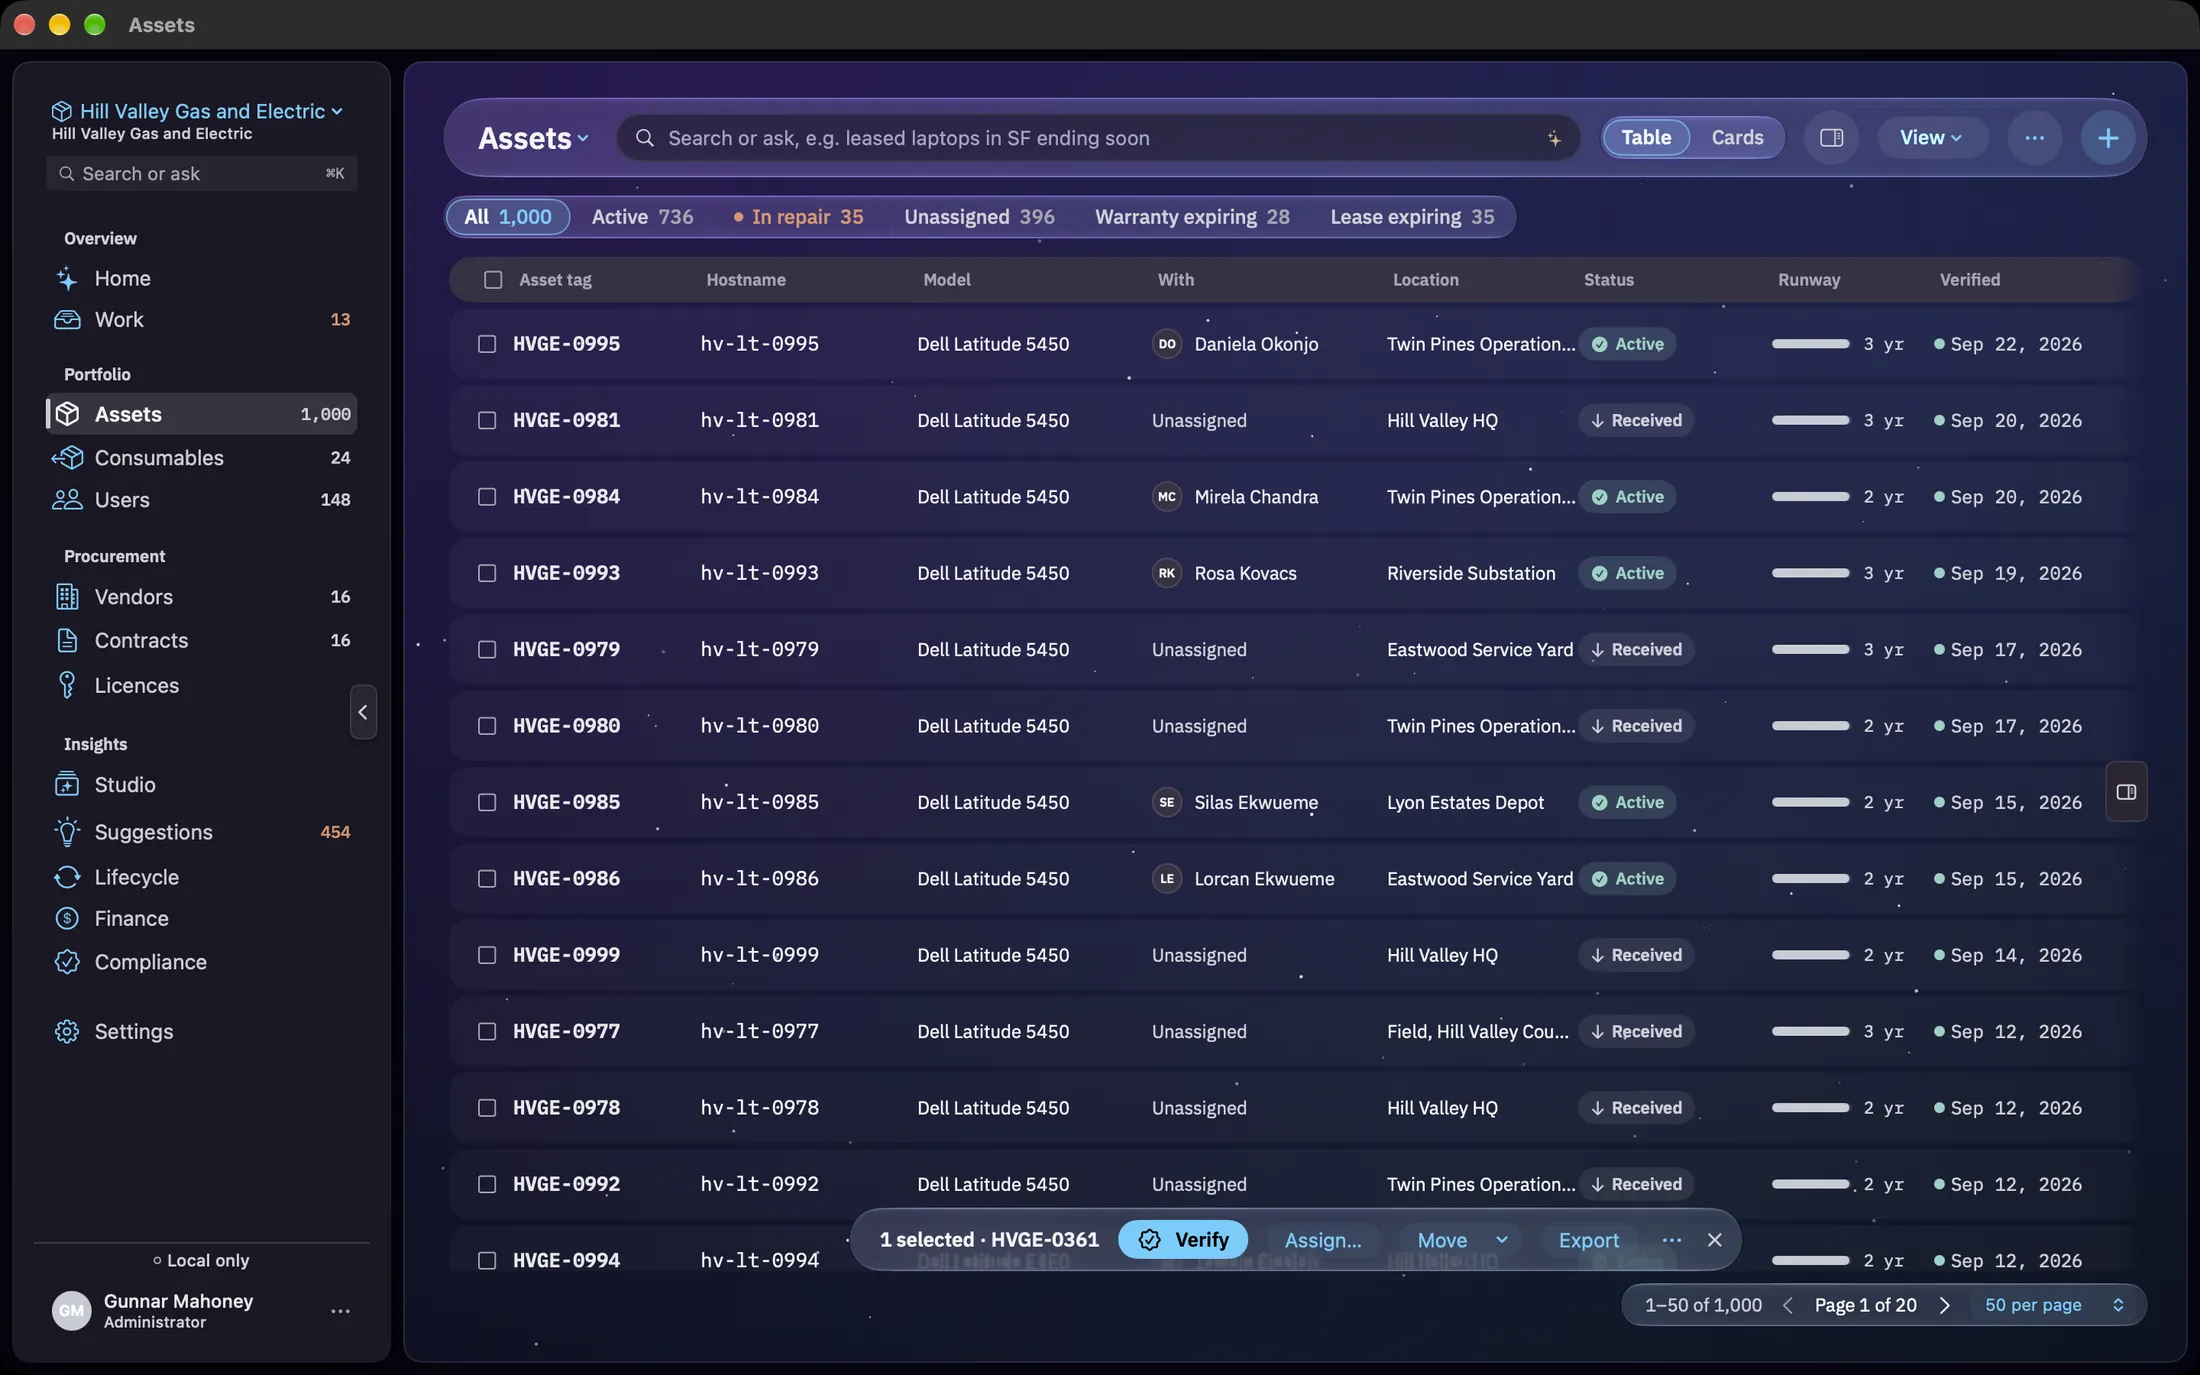
The bar names what you have chosen, such as 1 selected · HVGE-0361, or two tags and how many more. With a single row selected and the inspector open, the bar stays down, because the inspector’s foot already carries that machine’s acts. Select a second row, or fold the inspector away, and it rises. The box at the head of the table selects or clears everything on the current page. The cross at the end of the bar, or Escape, clears the selection.
- Verify appears only when one asset is selected, and records that you have physically checked it. There is no verifying two hundred at once.
- Assign… hands them all to one person, typed or picked from your directory. Leave the name empty to unassign them.
- Move lists the stockrooms defined in Settings, with Remove from stockroom to take machines out of one.
- Export writes a CSV of exactly the selection, not the page.
The ••• at the end of the bar holds three more.
- Edit fields… sets any of status, department, site, stockroom, criticality, ownership, data classification, vendor, warranty expiry and the audit flag across the selection at once. Each machine is still its own audited change.
- Change status offers every status except Disposed. After setting Lost or Stolen, an admin is asked whether to remove those machines from book value. Only machines that carry a book value are asked about, so a leased one normally is not, and Keep on the books leaves the figures as they were. See Lost or stolen.
- Delete… is a soft delete, and asks first. The assets are hidden and their audit trail is kept, because a machine that existed still happened.
Disposed is deliberately not in the bulk list. Retiring two hundred machines in a click would produce two hundred records with no account of how they left, and the account is the thing an auditor asks for. Disposal is per asset because the evidence is per asset. See Retiring a machine.
Turning a view into something you can send
The current filter is already a question. The ••• menu in the glass bar turns it into an answer somebody else can read.
Dashboard from this view and Report from this view both hand the Studio whatever the table is currently showing, described in words: the question you asked, or the search you typed, or the pill you clicked. You are not rebuilding the filter at the other end.
The same menu holds Alerts, with a count when any are open.